Build and use the CCExtractor flutter GUI
A cleaner version of this doc can be found here
The new cross platform interface is all you need, as it includes all the options. After installing GUI you will have a shortcut in your desktop, this lets users not familiar with CLI to extract subtitles. Usually, you will never need to use all the options (and even if you do, all the setting are saved locally at Documents/config.json in your PC) for regular usage.
Install from releases (WINDOWS ONLY)
- This is the simplest method, just download the installer form here (currently only has windows), and then install it like any other windows program.
If you run the GUI from nighly builds or source, you need to manually have the ccextractor binary in your PATH (
ccextractorwinfull.exe if you are on windows or ccextractor if you are on linux/macOS)Nightly builds (WINDOWS, LINUX)
- You can also get the latest files for your operating system from here.
- Once you unzip it, you should see a ccxgui executable in the folder. Double click to run :D
Building and running the GUI from source (WINDOWS, LINUX & MACOS)
- This method only makes sense for poeple who actually want ot debug the app. If you want to skip the hastle of installing frameworks and stuff just go the nightly way, the CI does these below steps for you automatically on every commit.
- To build the GUI from source first install flutter from here for your operating system.
- Next enable the flutter platform specific flag with
flutter config --enable-<platform>-desktop, more info on this here - Then clone this repository and run
flutter run -d <platform> --releaseto run the app. - To install the Gui you will need to build it using
flutter build <platform> --release. The release builds should be located under /build/<platform>
Additional macOS steps:
- If you build and install from source, you will probably get a
Process not permitted operation errorto fix remove
1<key>com.apple.security.app-sandbox</key>
2	<true/>
from macos/*.entitlements files
Using the GUI
The GUI is mainly divided into 2 parts, the home screen and the settings screen(s).
- The home screen is where you can click the add files button and select one or multiple files.
Home screen
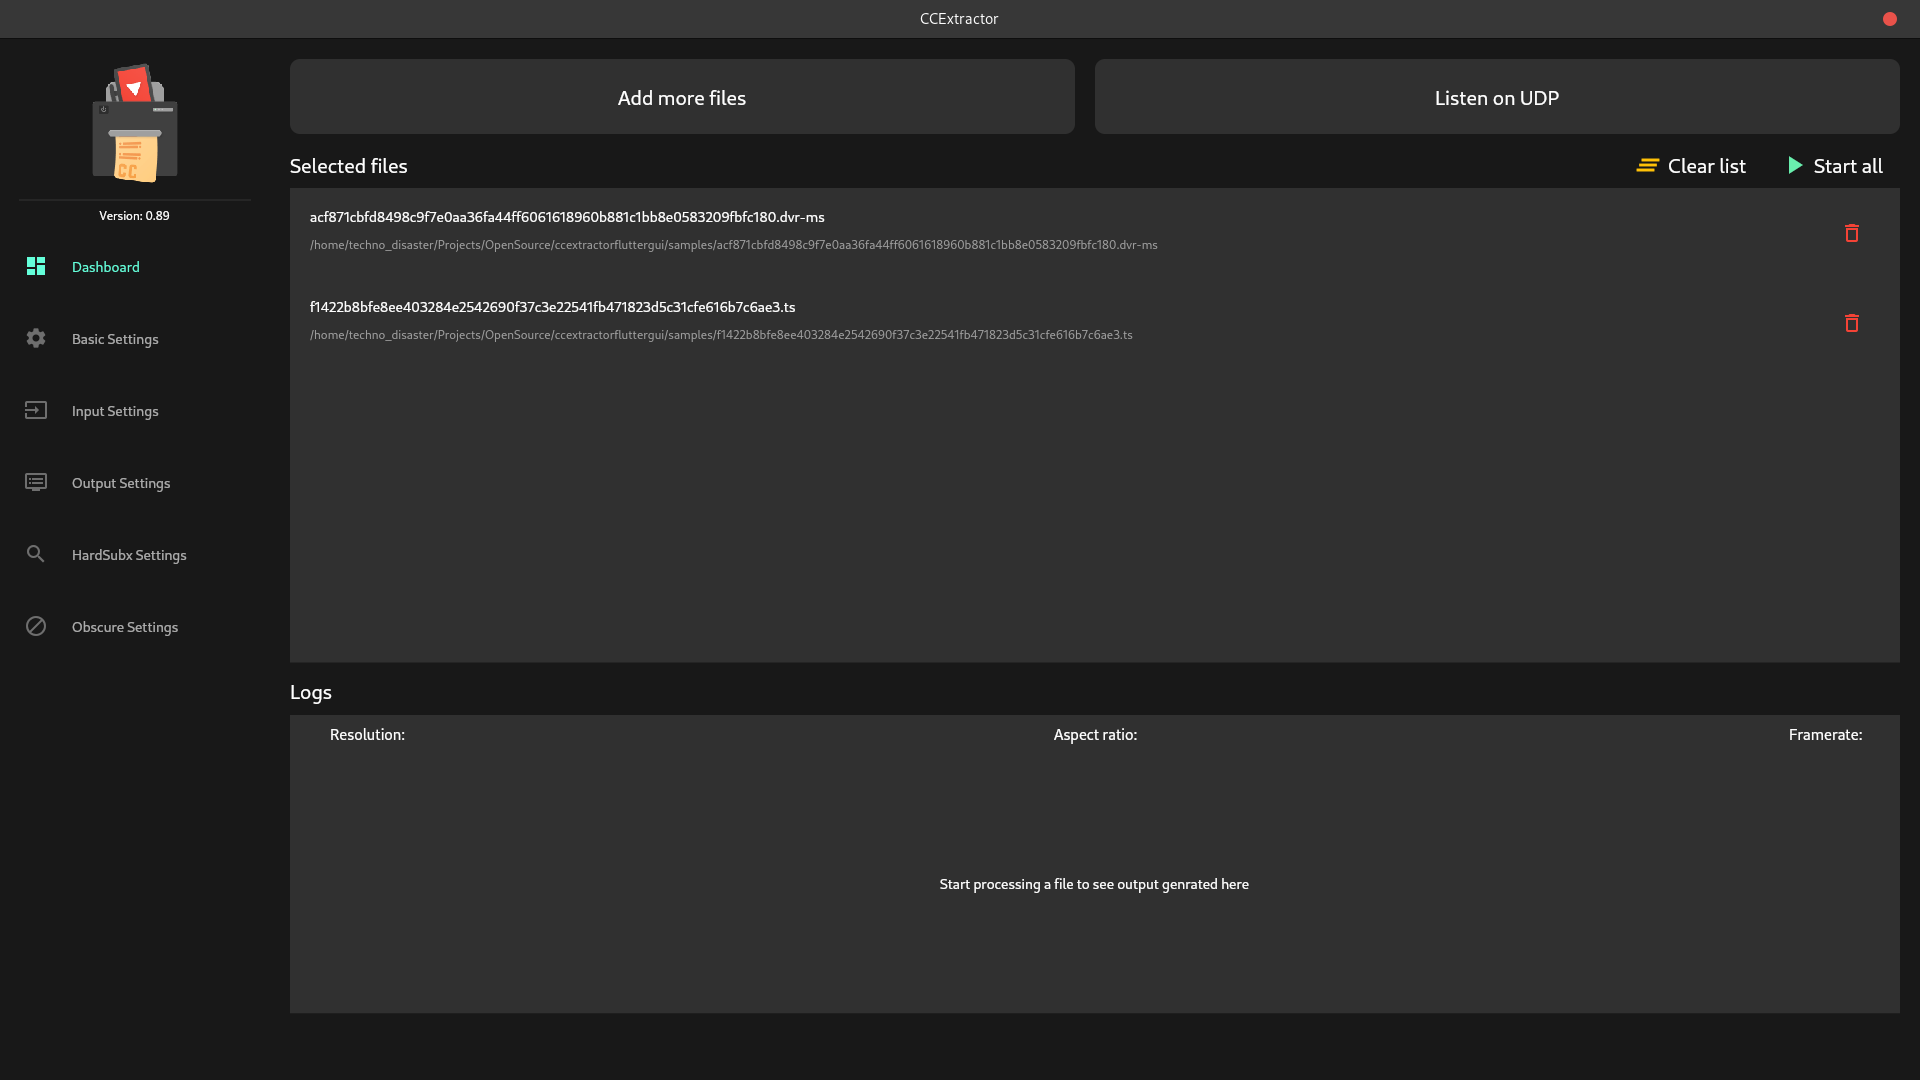
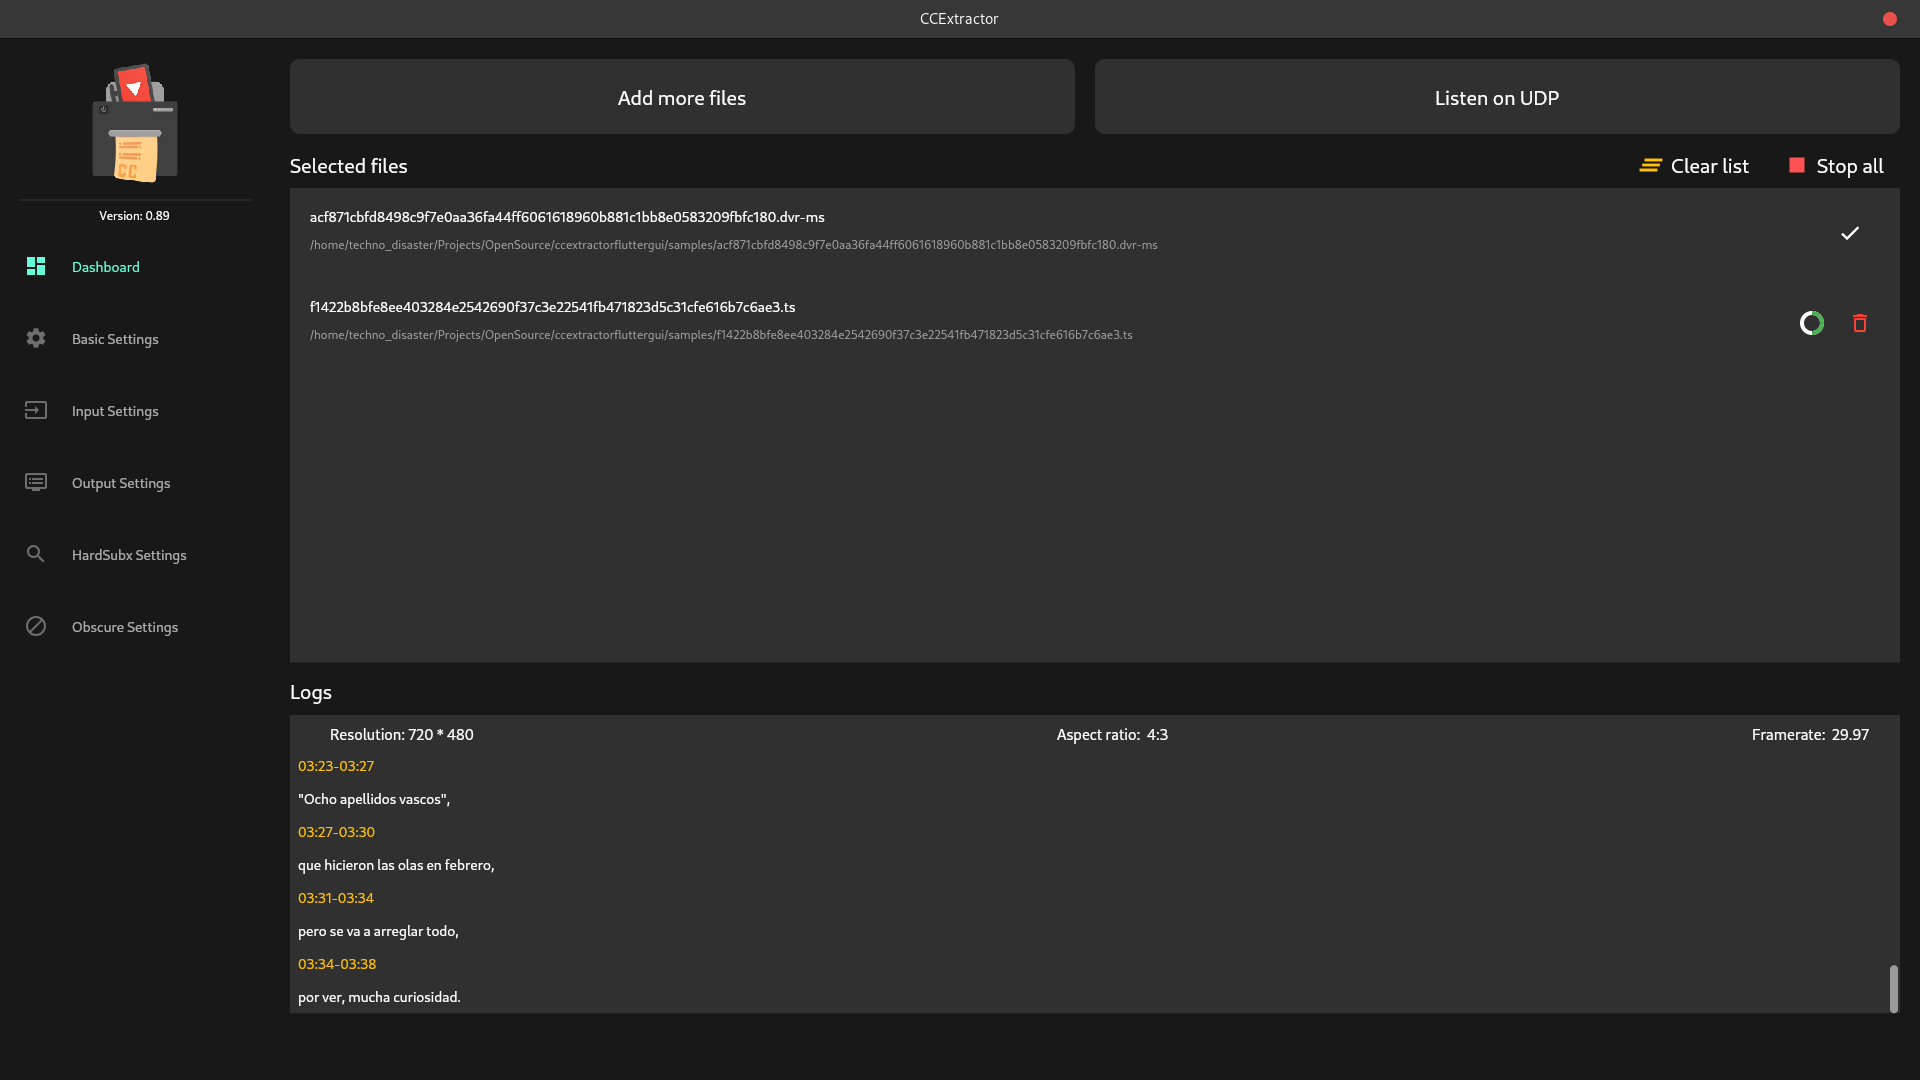
- Once you select your files use the start all button to start running ccextractor on the selected files one by one.
- How it works? The GUI simply uses a dart process which runs the ccextractor binary with the selected settings
- You can see the live output in the Logs container below.
- You can also use the clear list button to remove all the selected files from the menu.
- The progress for each file is shown with a circular green progress indicator.
- You can cancel/remove any file from the selected files using the delete button.
- To stop ccextractor, simply press the stop all button.
Settings screen(S)
The GUI has tons of options so they are seperated into several settings screens. All of the options are saved locally in a json file so you can save the settings you need frequently,

- Each setting screen has a current command container at the top which shows you the exact command with the selected settings you will run when you click start all on the home page.
- To update the sttings, simply toggle the option or select the option from the dropdown menu.
- To save settings which have a textfield press enter after you enter your setting value in the textfield.
- You can also reset the settings back to the default value with the reset settings button on the top right corner of each of the settings page
To report any bugs, please file a issue on github or get in touch with us on Zulip. Most CCExtractor developers hang out on Zulip. You're welcome to request an invitation here